
I’d love for everyone to take on an allotment. But what’s more important to me is that everyone has the opportunity to have a go at growing their own.
I was thrilled when Richard Holland agreed to write this guest post all about the incredible job he has done creating a magnificent kitchen garden at home. I hope you enjoy and be prepared to be inspired.
Enter Richard…
When we moved into our new house, we knew we wanted to create a veg plot.
We wanted to create a space for growing our own that we could use for the next 20 years. The new garden provided us with the same area as a half allotment plot and to make sure our kitchen garden would be a success, we followed four basic principles – the 4 Ps.
1. Patience
Patience is a virtue and particularly so when making decisions for setting up a kitchen garden.
In the first year of growing, we did nothing but use the beds that were already there. This helped us to understand the type of soil we had inherited, where the sun reached, where the shade was and what happens when it rains heavily.

The right-hand side of our garden gets very little sun from October to March. The soil is clay – the type of clay you could make pots from by hand. When it rains heavily, the clay soil gets soaked and the water runs from the bottom the garden down to the house and out to the road. Rivers of it!
2. Planning and preparation
Over the year we drew up a plan and created a wish list.
- Maximize the amount of sun the beds get
- Improve the drainage and improve the clay soil
- Keep the two greenhouses in place
- Create an asparagus bed
- Create enough beds to allow us to perform crop rotation
- Create room to allow a wheelbarrow to move easily around the plot
- Create somewhere to sit
- Create space for compost beds
- Create an area to allow us to trial new crops or a space for growing crops for saving seed
We made a lot of sketches of possible layouts – large circular beds, square and triangular beds, raised beds. It became obvious fairly quickly that the only sensible solution we had was to create raised beds.
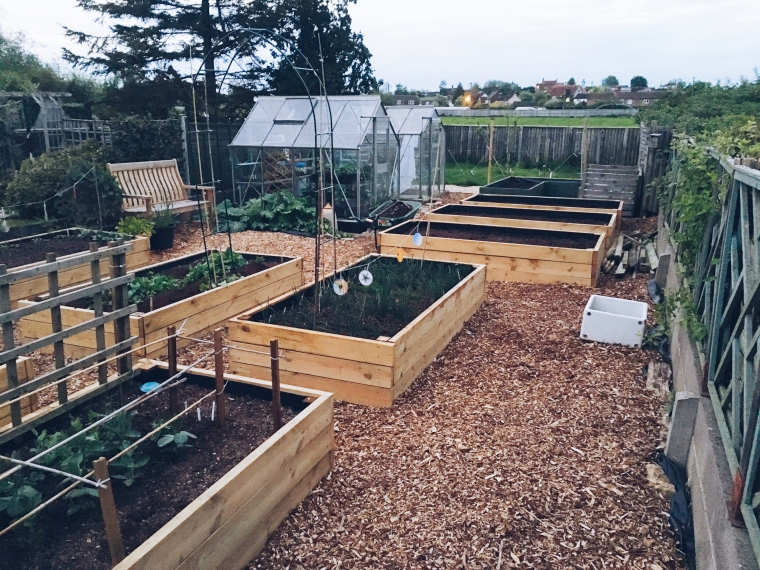
We drew a plan on graph paper and this enabled us to see that we could squeeze in 10 beds and still have space for a couple of other beds to build over the winter that year.
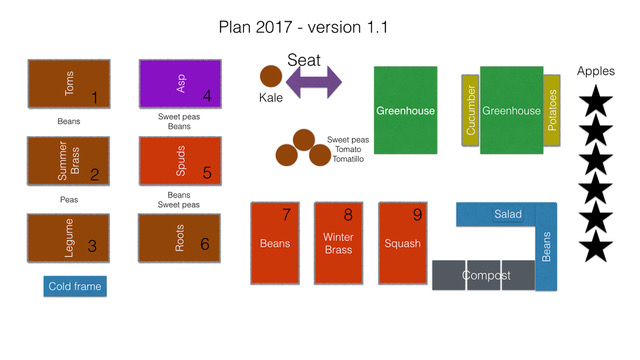
We have 8 beds for normal crop rotations, the asparagus bed in the sunniest spot of the garden and a bed near the bins to grow beans for saving seed and salad leaves.
Next year we will add another two, slimmer beds for rhubarb and more salad leaves.
3. Painkillers
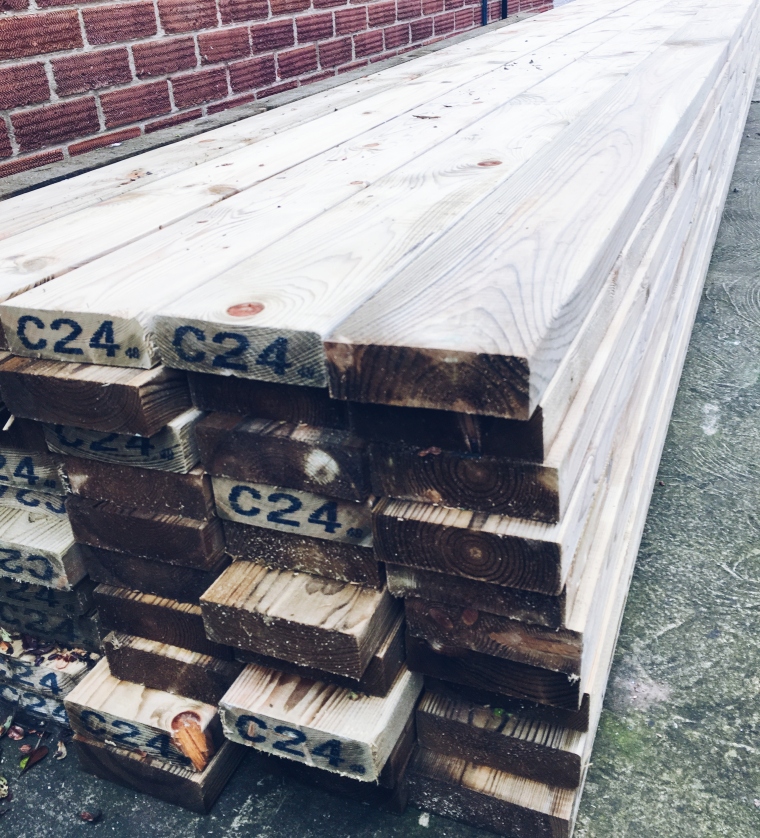
Building 10 raised beds is hard work! We worked through the frosts in January and February to lay the membrane and build the beds.
The wood came from a local timber merchant and cost around £800 – plus 100’s of long decking screws.
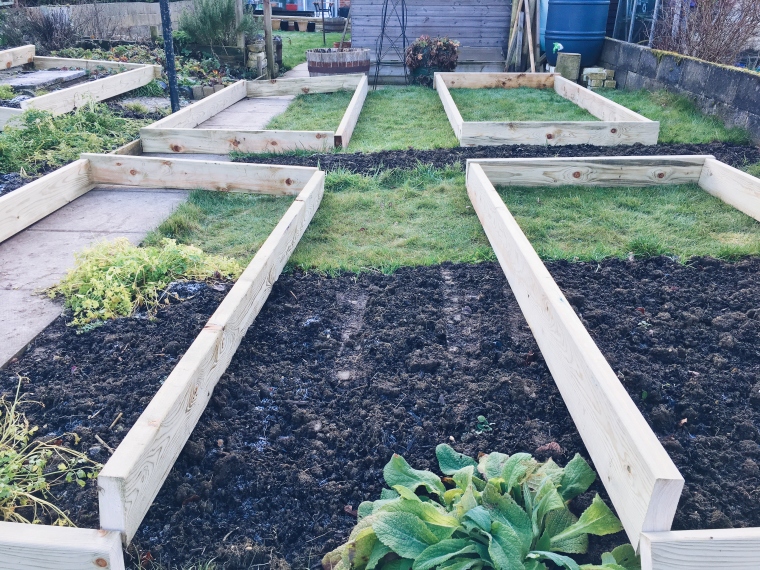
We bought in a raised bed mix from a local supplier to fill them – £85 for a ton. It was a mix of mushroom compost, topsoil, and manure.
We had 4 loads dropped on the drive and had to be barrow the lot 50m from the drive and into the beds. I think we’ll need another couple of loads this winter to top up the beds.
After that, it was 3 loads of bark chippings to move and spread out on the paths. We will need to top them up over the winter.
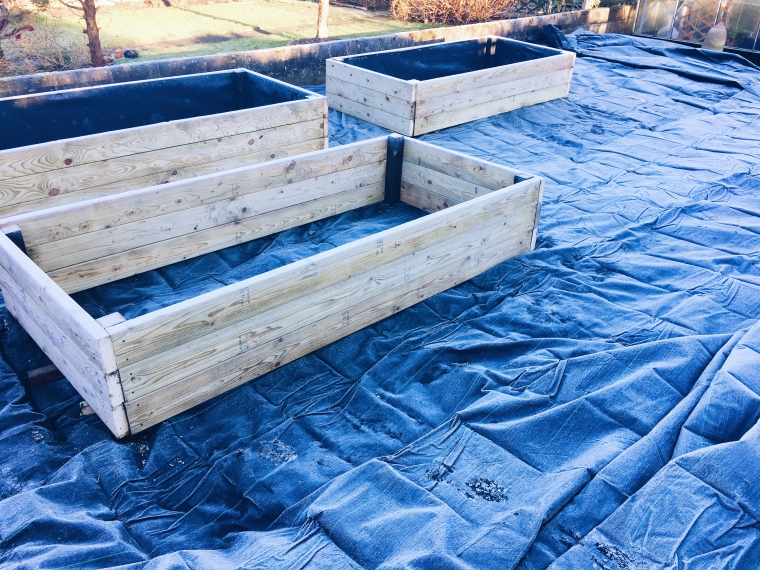

It was hard labour and every night for a month we flopped on the sofa after some paracetamol and a voltarol back rub.
4. Productivity
Planning, preparing and creating the right space means we have created the foundation for solid productivity.
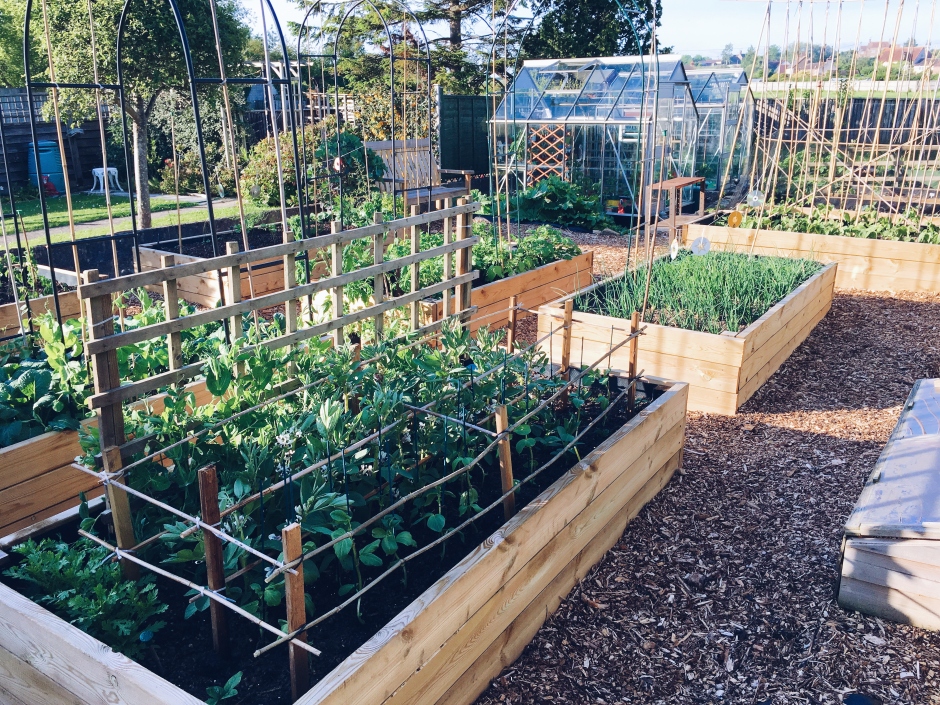
The beds have performed amazingly this year. They have more light and have warmed up quicker. The cold clay soil is at the bottom of the beds and acts as a water store without slowing down the veg.
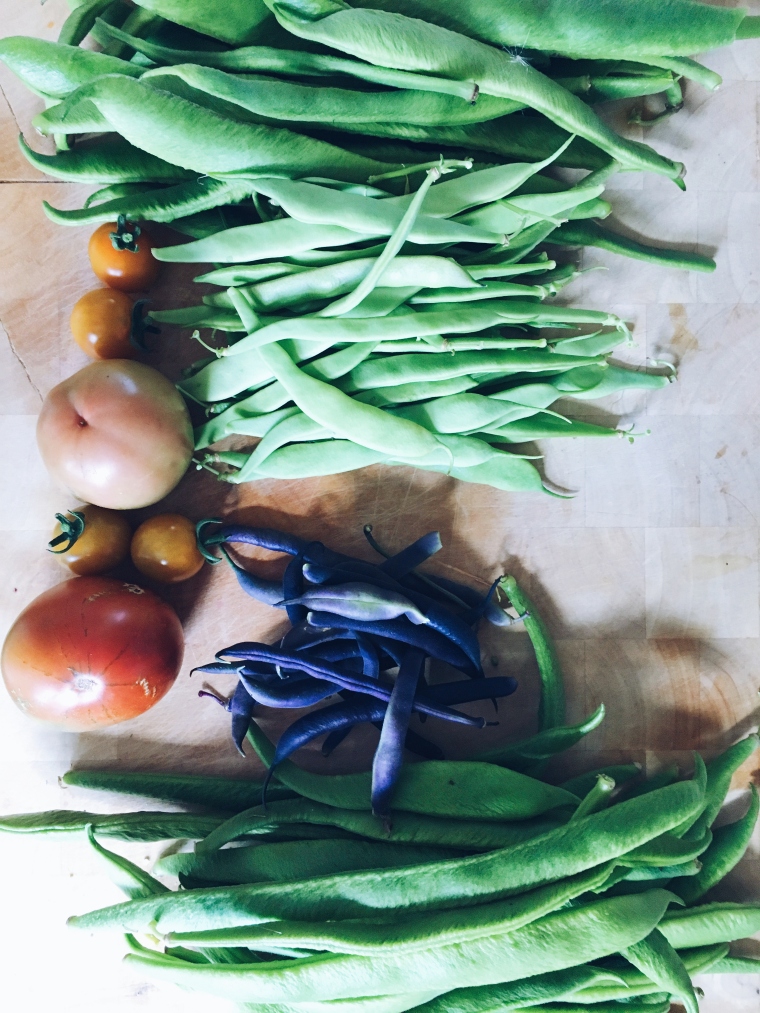
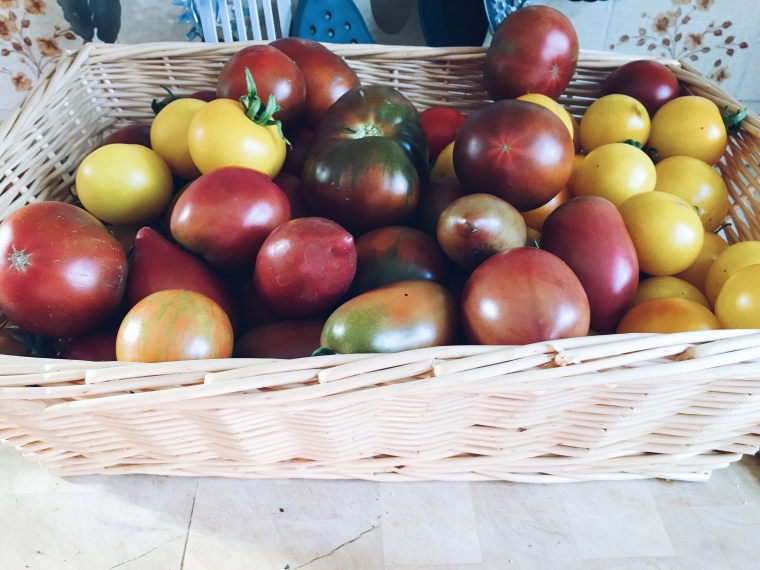
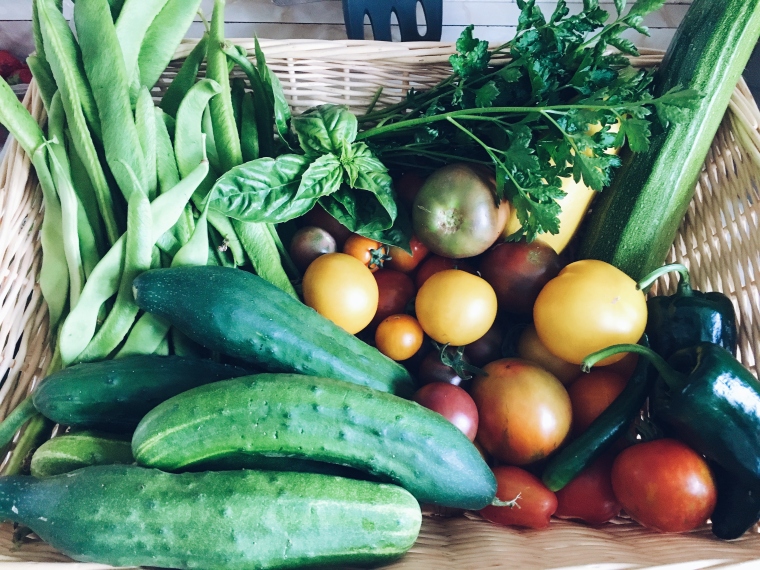
We’ve had a higher yield and better carrots that previous years and the beans have been really productive.
The bed that has been the most successful has been the summer brassica bed – chard, kale, Japanese spinach, kohl rabi, Raab broccoli so far and then more chard, winter spinach, winter radish and mizuna.
Following a trip to RHS Harlow Carr we added arches between the beds. Some worked better than others. The runners loved them but the peas and sweet peas struggled.
I think that we were over ambitious with the number of squashes we could cram into one bed 1.2×2.4m – the answer is not 5 and 3 courgettes.
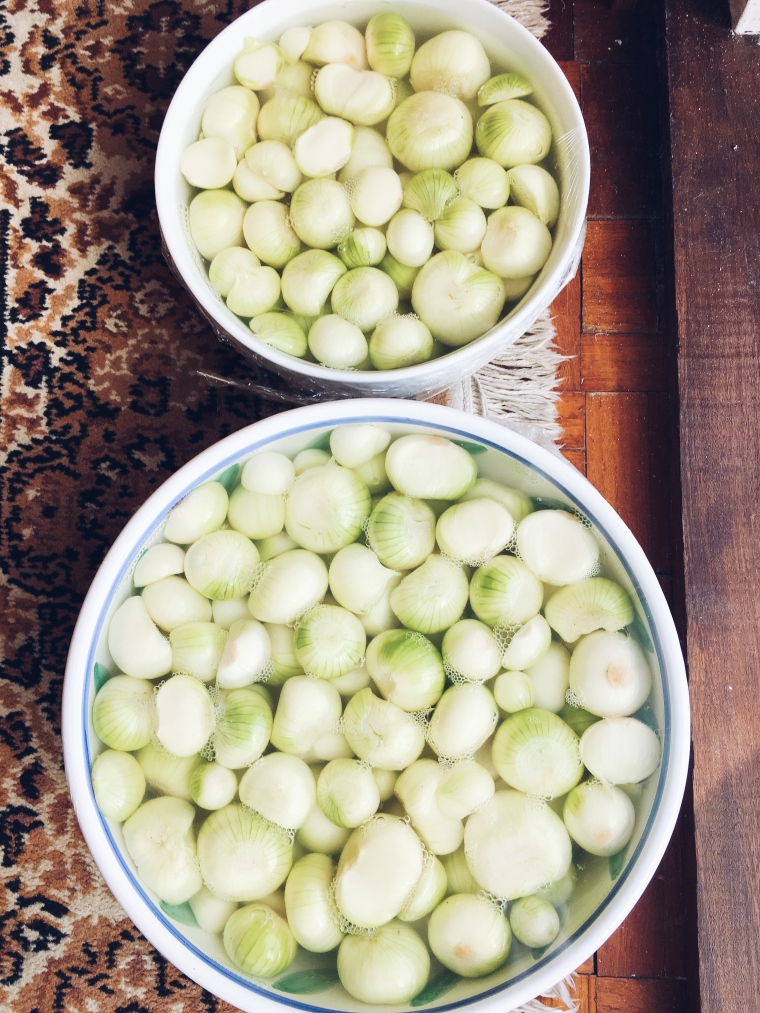
The carrots didn’t get root fly and the shallots didn’t get onion fly. Packing in the crops also really helps to control the weeds.
We have spent very little time on the hard chores this year.
I am so excited about next year – planning changes and tweak and picking out all the new veg to try. Plus we are going to try and get more flowers in there too.

Lessons learnt
Some negatives:
- It takes a lot longer to make raised beds than we realised
- A raised bed needs LOADS of soil to fill it – MUCH more than you think
- We are going to need lots of compost and muck to top up the beds this winter
The Positives:
- Weeding is so easy! I mean ridiculously easy.
- You really can pack in lots of crops. We have maximized growing in every bed and lots of repeat cropping
- There is more sun reaching the shady side of the garden
- The bark chipping soak up rain and we have had no rivers this year
- It is easy to go 100% no dig with these beds
You can follow Richard’s new season in the kitchen garden on his blog: Home Grown. You can also follow him on Twitter and Instagram.
Follow Sharpen Your Spades! You can receive my post by email by subscribing to the blog (Right or Below) or you can follow me on BlogLovin.
You can get in touch with me here.


Thank you for asking me to write a guest blog entry. It has also given me the push to start writing mine again.
I hope others find it useful and interesting
LikeLiked by 1 person
It really is inspiring Richard. Thank you for writing it 😊
LikeLiked by 1 person
That was a good read! My garden is very similar, but it was not created all at the same time. Instead it evolved. For instance, I built my raised beds progressively – 2 per year (due to financial constraints!) – and have subsequently improved them by doubling the depth when replacing them once the first bits of wood decayed. I still have problems with lack of direct sunlight and that will only get worse as the surrounding trees get bigger. I liked Richard’s “Painkillers” heading!
LikeLiked by 2 people
Thanks Mark. We are very lucky that the neighbours don’t have any tall trees that block the sunlight. The good thing about the beds is the lack of need for painkillers now, weeding is so easy and no more digging
LikeLiked by 1 person
I looked at the header photo and thought “What a transformation! Unbelievable! Your allotment has come on in leaps and bounds! How did you do it?”. Then I realised it was THAT Richard. Which, of course, explains it all. Those guys are not afraid of hard work. That’s not a garden, it’s an art form. Beautiful.
LikeLiked by 1 person
Thanks John. Now there is no hard work 🙂
And this Richard is no shirker – he dealt with his flooding with LOTS of digging
LikeLiked by 2 people
Ha ha thanks Richard. But it did wipe me out I must admit!
LikeLiked by 2 people