

Allotment gardening and the opportunity to grow your own fruit and vegetables should be accessible to everyone.
I still consider allotment rent affordable and very good value for money although I believe most local authorities fall short in the support and engagement they could provide to enable the full potential of these sites to be achieved.
By their very nature, allotment gardeners are people with a tendency to use other people’s ‘rubbish’ to create usable resources. It’s a cliché. But I like it and it’s a mindset I’d encourage.
I accept, a polytunnel or greenhouse is not necessary to enjoy the pleasures of growing your own fruit and vegetables, however, the ability to grow undercover extends the season and allows us to produce exotic and an even greater variety of fruit and vegetables for the kitchen table. It’s also true that these tend to be the crops that are also expensive to buy in the supermarkets.
High-quality commercial polytunnels and greenhouses cost a lot of money. And sure, if money isn’t a problem then you’d be wise to invest in one. Still, I don’t like financial restrictions preventing people from having the opportunity to grow their own fruit and vegetables and so I wanted to build my own polytunnel within a friendly budget.
I set out to find ways to do this and I can assure you, there are options to mitigate the hefty price tag of polytunnels. The approach you choose will depend upon your own circumstances. One thing I will say, I present these options as a way to generate ideas. There is never a perfect way. These are just a few things that came from my own research into this project.
Firstly, a polytunnel does not have to be fancy to enable you to gain the benefit growing under cover provides. The simplest option I discovered came from one of my favourite vegetable gardeners, Eliot Coleman. It involves a few PVC pipes, some Rebar (Steel reinforcing bar used in construction) and polytunnel polythene for the cover. Check out this video to see how easy this is to build. The tips on polytunnel creation start at 9:05.
If you enjoy DIY and fancy building something which potentially offers a more secure structure, then this is an excellent step-by-step guide to building a polytunnel using parts that are relatively easy to find and, if you do your research, cheaply through second-hand sources.
I think these are fantastic ideas of ways to build a polytunnel and I’d certainly encourage you to consider going this route. However, I decided on another option.
eBay offers a range of sellers offering budget polytunnels of different sizes. They change fairly often but all seem to be similar in style and price.
As I researched this option, I read mixed reviews about these polytunnels. It’s often the case you will get what you pay. However, the more I read and the more I looked at these tunnels, I felt there were certain weaknesses I could accept and there were ways to work with them to make some improvements.
The covers more than anything get a bit of a bad rep. Some have said theirs has lasted a few months but others, and I know one individual on my own allotment site, has had theirs for years.
The most important thing for me was to have a frame to work with. I figured, because of the overall cost, if the cover lasted no longer than the end of the season, I could spend a bit more and purchase a roll of high quality, UV resistant polytunnel fabric further down the line which would last a number of years.
I decided to buy a 16 x 6ft budget polytunnel for £69.99.

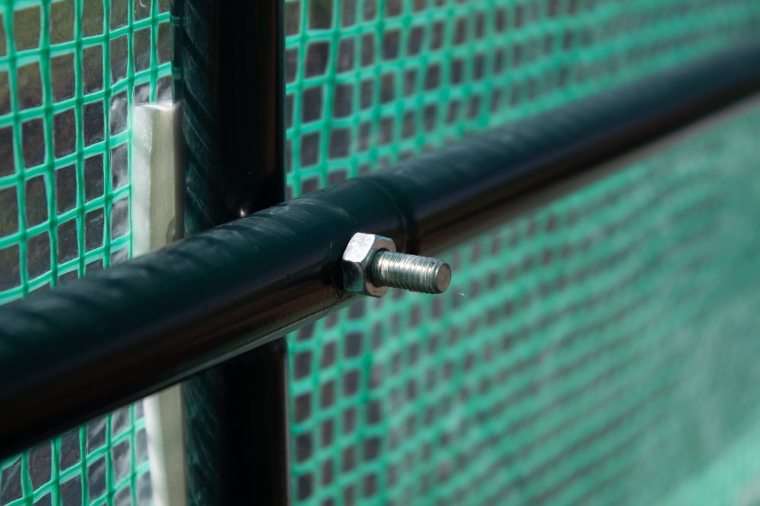
The frames of the budget polytunnels on eBay are usually made from galvanised steel. They are not huge and are lightweight, but they work perfectly well, it’s just a matter of anchoring the frame as securely as possible.
Don’t expect too much by way of instructions. Inside my package was a single sheet of paper a stick drawing with numbers. The numbers related to the individually sized poles, however, frustratingly the numbers are stuck onto the bags and not each pole. So you must make sure to keep the poles in their bags and only pull one out as you follow along with the instructions.
The package came with all the parts. No missing poles or screws. The lack of detailed instructions did mean putting the frame together took me, on my own, a good few hours. My advice, get a friend to give you hand if you want to make this a faster job.
Anchoring the tunnel is very important with these lightweight structures. I spent £15 on these tree stakes. I hammered one at each corner of the tunnel and secured them to the steel frame. They seem to do a good job, but the autumn and winter storms will likely judge that.
Unfortunately, there was very little skirt at the bottom of the cover. I had hoped to dig a trench around the polytunnel and bury the bottom of the cover to hold it secure. Instead, I used timber from reclaimed pallets to create a double frame around the base of the tunnel. To secure the cover, I sandwiched the bottom between the frames and screwed the two together.


The tunnel has happily stood over the summer months housing my tomato plants. It’s given me the chance to get a ‘feel’ for it and note any potential problems. I am nervous about the potential storms in autumn and winter, and I have some ideas on improving the anchorage – including the option of building a door frame which will be secured into the ground.


I genuinely believe this is a good option for those who are working within a budget for expanding the possibilities on their own kitchen gardens and allotments. Don’t take this article as the be-all and end-all for building a budget polytunnel. Use it to generate ideas that will be suitable for your own circumstances. Good luck.
If you enjoyed this post, I’d love if you would share it using the buttons below.
Follow Sharpen Your Spades! You can receive my posts by email – Subscribe here.
Follow me on BlogLovin.
You can get in touch with me here.
Connect with me on Twitter, Facebook and Instagram.


Providing adequate ventilation to prevent overheating is also an issue in years like 2018! I presume the type of product you bought is made in China, but I wonder what part of the world they are intended for. Are there places that get nearly no wind, where Winter storms will not blow the tunnels away…?
LikeLiked by 1 person
Possibly yes. I imagine you are right Mark. A few people on the site have used these tunnels with pretty good success. Clearly it’s best to put this up in a wind sheltered part of the plot. I’m reasonably lucky with that. I think my key point is that with a bit of thought, you can get a poly tunnel without spending hundreds of pounds. They need tinkering.
LikeLike
if I give you a ton and lots of cake and beer can you come build me one plz 😀
LikeLiked by 2 people
SOLD!!!! 😍
LikeLiked by 1 person
Those who dismiss them as cheap rubbish call them, somewhat derisively, ‘blowaways’. I have one which has been going now for 6 years. Whilst I have had to replace the cover (not the frame akin to “Trigger’s Broom’) on a couple of occasions it has still worked out at less than £20 per year. The problems I have had a) zip on the door has broken b) the cords on each corner, intended to allow one to anchor the structure, have in fact, in high winds, caused the cover to rip.
The solution to a) was to contact the manufacturer/seller & ask for a replacement zip. This they were unable so to do but instead sent out a complete new cover gratis. (Well done Gardmann). b) Ignore the anchor cords & do as you did by attaching the frame to ground anchors, in my case fence pins which I hammered into the ground. As you say allotment holders are resourceful fellows so the ‘old’ covers don’t go to waste. One is now wrapped around a plot of sweetcorn protecting it from voracious deer the other has been cut into panels and has been used, wrapped over hoops of plumbing pipe, as early protection for other crops. I, like you, considered a more expensive polytunnel (partly cos I didn’t want the so called professionals laughing at me) but simply in terms of cost doubt I that I could have done better. We also have two small (8’x6′) glasshouses – both rescued or donated but ventilation in the ‘tunnel’ is far easier with the option of opening both ends.
I look forward to seeing what you manage to grow & how your season progresses. Cheap or expensive it’s still a non-stop round of watering I’m afraid ;-(
LikeLiked by 1 person
All of our ‘hoop’ houses are made with pvc pipe and vinyl. I have never assembled a prefabricated greenhouse, although I think I would prefer them. Now that ours are assembled, we have no use for more in our mild climate.
LikeLiked by 1 person
Thanks for these tips – could you let me know how you secured the tree stakes to the frame please?
LikeLike
Hi Kirstie. I suggest cable ties or rope. You need to get the frame as tight as possible onto the stakes
LikeLike
Hi, thank you for this post. I’m just wondering, how is your polytunnel holding up now? Thinking of purchasing a similar one.
LikeLike